Sunday 29 May 2016

How to Connect / Disconnect BSNL Broadband/Landline from

How to  Connect / Disconnect BSNL  Broadband/Landline from

BSNL (Bharat Sanchar Nigam Limited) Connection for new landline or broadband connection/ Disconnection for the broadband or landline can be done by fill the form and summiting to the nearby BSNL Office. In BSNL FORM you can ADD Facility for (OPENING/ CLOSING) your BSNL service.

Fill the FORM (BSNL)

1. Affix self signed passport size photograph
2. Telephone number (is case of disconnection of BSNL)
3. Name of the customer
4. Address
5. Facilities to be (opened)
6. Facilities to be (colsed)
7. Then signature of the customer.

After filling the form just submit the form to nearby BSNL Office. You can attach the letter with this form for disconnection of your landline or broadband internet service.

Example of request letter for disconnection

To,
BSNL Customer Care
You’re Place

Date:
Sub: Disconnection of my BSNL Landline/Broadband
Sir,
I would like to surrender my BSNL Landline/Broadband since I am not using the same. Kindly do the necessary steps.

Enclosed are:
> Surrender form duly filled
>Copy of latest telephone bill
Please also disable any services availed.
Eagerly waiting for your action.

Thanking You
Yours Sincerely,
You’re Name

You’re Address

Mobile: Your Mobile Number


TAG :How to disconnect bsnl broadband, how to disconnect bsnl broadband connection temporarily, disconnect bsnl broadband connection application,application to surrender bsnl broadband connection,i want to disconnect my bsnl broadband connection letter,bsnl broadband closing letter,bsnl broadband cancellation form online, disconnect bsnl broadband connection application, how to disconnect bsnl broadband connection online,bsnl lead tracking,bsnl complaint register online,How to Connect / Disconnect BSNL Broadband/Landline from.

Thursday 21 April 2016

How to Remove Hyperlinks form Image in Blogger Post

How to disable the hyperlinks form images in blogger post

In Blogger when we upload a image by default it make a hyperlink to that image, whenever someone click to the image it causes to be opened in a new tab window this is the default behavior for the images in blogger. One of my users asked me, is any way to remove this hyperlink form image in blogger post? Today in this post we will learn how we can remove the hyperlinks that are created automatically.

Probably there are many ways to remove hyperlinks but the shortest and the easiest way we can do this is by the Two methods that are given below.


The easy way to do is with CSS code, as it’s not a behavioral language (ie. Java Script). To remove the hyperlink form the pictures of your blog post you can use the pure CSS.

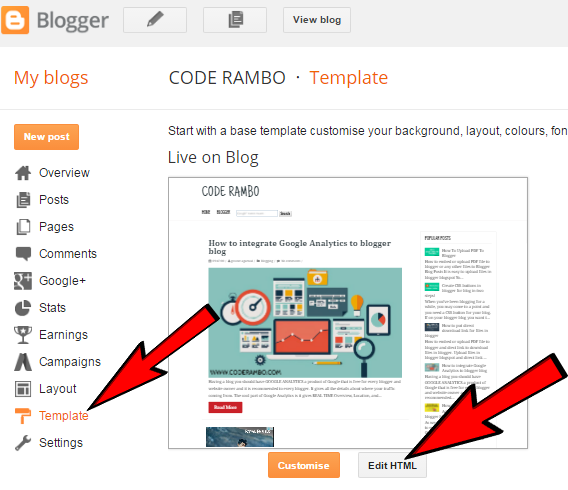
STEP - 1  GO to Blogger > Templates > Edit HTML

How to disable the hyperlinks form images in blogger post

STEP - 1  Search CRTl + F For

.post img

Note: If you don’t find the .post img then search for

</b:skin>

Then past the below code inside it and if you find the code .post img then just replace code with the below code.

.post img{max-width: 100%;
height: auto;
pointer-events: none;
cursor: default;
}

It will make the image link not clickable and the cursor style as a arrow, then the image will not open in new tab windows and this is probably the shortest code for doing this.

Now click on SAVE TEMPLATE You are all done.

One of the alternative methods to disable the hyperlink of the image in blogger post is to remove the link form your post before publishing.

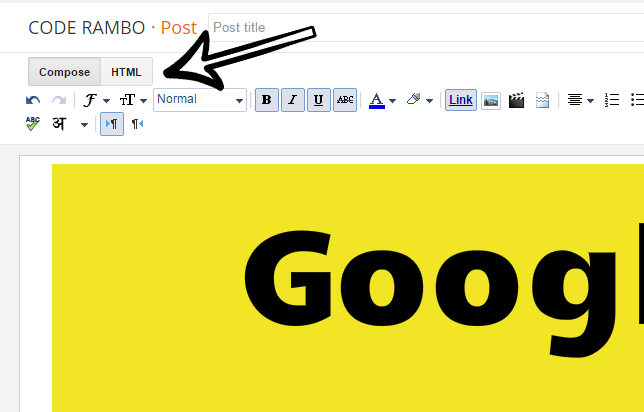
STEP - 1  Upload your image then click HTML

How to disable the hyperlinks form images in blogger post

There you will find code of image that you have uploaded, which something look like this.
<a href="https://blogger.googleusercontent.com/img/b/R29vZ2xl/AVvXsEg7zbR-wQYJkQF5yDVL7ZdQ97Uiue2ZJm9xsk6P3znr04GY1tRtMSreCptwnDdRQdzH-VxiBFpycqBDuykXWKscRaD2ruwlL9ZfMLRZGCNpWYQTgGNJFCsiBFz2EzGNz7URjKl-XAmd63jO/s1600/how-to-remove-hyperlink-form-image-go-to-HTML.PNG" imageanchor="1" >

<img border="0" src="https://blogger.googleusercontent.com/img/b/R29vZ2xl/AVvXsEg7zbR-wQYJkQF5yDVL7ZdQ97Uiue2ZJm9xsk6P3znr04GY1tRtMSreCptwnDdRQdzH-VxiBFpycqBDuykXWKscRaD2ruwlL9ZfMLRZGCNpWYQTgGNJFCsiBFz2EzGNz7URjKl-XAmd63jO/s1600/how-to-remove-hyperlink-form-image-go-to-HTML.PNG" />

</a>

Just remove the highlighted code show above. This will also help you to remove the hyperlink form the image that you have uploaded on your blog.

But I suggest you to follow the 1st method that will be easy for you, because you won't have to remove the hyperlink again and again. Any dought you can ask as we will try to help you out. Hope you have understood how we can disable the hyperlink that is automatically generated by default in blogger.

Wednesday 20 April 2016

How to Change or Add New Favicon In Blogger

change the website icon or favicon in blogger

Favicon also know as website icon mostly of 16 X 16 Pixels in blogger you can change your website ion or favicon very easily. To remove the blogger default favicon , the big B icon to change that so that your website look like a professional one should add the custom favicon to their blog.

In Blogger BlogSpot you can upload your favicon or website icon up to 100 kb; you can upload the website icon in JPEG or PNG format. So make your favicon less then 100kb so that you can upload it and look like a professional blogger.

change the website icon or favicon in blogger

STEP - 1  Go to blogger > Blogger dashboard > layout

change the website icon or favicon in blogger

STEP - 2  In layout of your website you will see on the top most favicon > Edit

change the website icon or favicon in blogger

Note: If you don’t find favicon option or you want to add animated favicon to blogger you can follow from Step - 4

STEP - 3   Now you can chose you favicon and upload it, it should not be more than 100kb and save.

change the website icon or favicon in blogger

You are all done your favicon have been uploaded now you can enjoy with new professional website icon.
change the website icon or favicon in blogger

Note: If will take 24 hr or more to show the result on web server, but if then also Favicon is not been uploaded you have to repeat the same process again.

STEP - 4   For animated favicon to blogger Go to Blogger dashboard > template > Edit html

change the website icon or favicon in blogger

STEP - 5  Search for <b:skin>

change the website icon or favicon in blogger

STEP - 5  Now just above that past the bellow code.

<link href="add-your-favicon-url-here” rel="icon" type="image/gif"/>


Now replace add-your-favicon-url-here to your favicon link and save the template.
You are all done hope this works for you any doughy we will try to help you out, we think you have understood how we can add new favicon or website icon to blogger.

Tips to place the ads to increase the Google Adsense revenue

how to place the ads to increase the adsense revenue
Do you use Google Adsense on your blog & want to increase your revenue then these tips will help you to increase your revenue.

Size and location of Google Adsense play an important role to increase your Google Adsense revenue, in this post we will talk about this. The top Advertisement program for blogger is Google Adsense. The placement/ location of your Google ADS in your post is very important to increase your RPM.


You can defiantly maximize your earning by placing your ADS at right place, but be careful on placing your ads you should not force your viewers/ users to click on ads it is against the adsense policies and the publisher may not ask anyone to click their ads. Adsense code should not be placed in POP-UPS or Emails.

70% of blogger problem are that they are getting traffic to their website but their adsense revenue is not increased, having same problem? One of the region may be the placement or position of your Google ads, believe me placement of your ads will surely increase your revenue the font color, size of ADS, is your ads text and image ads this matter a lot, after reading this tips you will surely boost up your revenue.

Placing Google ADS Just Under Title Tags Or After Introduction.


Placing ads below title tags or below introduction will help your ads visible to users, most of to user do not like to scroll down to read your entire post so by placing your ads on top will increase the chance of click to your ads. Now a question raises what type and which size of ads should be placed on top, I recommend 3 types of ads.

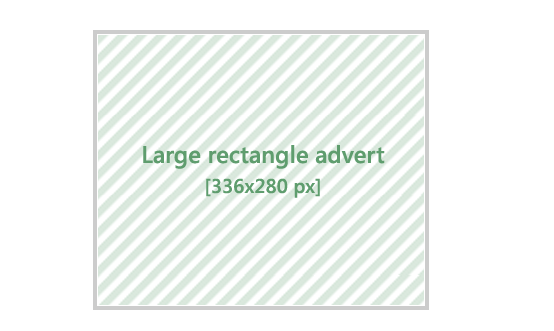
# 336 X 280 Pixels
how to place the ads to increase the adsense revenue

# 728 X 90 Pixels
how to place the ads to increase the adsense revenue

# Your post width X 280 pixels this is Custom Size ADS.
how to place the ads to increase the adsense revenue


Placing Google ADS Between The Content.


Placing the Ads between the content, the ads that should be placed between the posts are

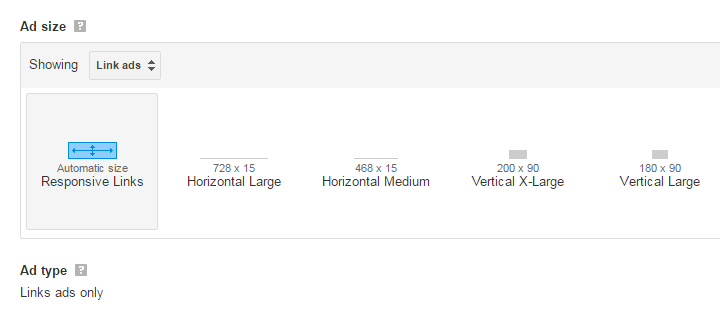
# Link Ads
how to place the ads to increase the adsense revenue
Link Ads are the Ads that are most powerful Ads, most of the blogger forget to apply on their blog so I suggest to apply it any were in your blog post and you can also apply it on your Navigation Bar to increase your Google Adsense revenue.

# Large Skyscraper ADS that is 300 X 600 pixels


Placing Google ADS At Bottom Of The Post.


Placing the ads at the bottom of your post will help you to increase your revenue. At bottom you can add Google ads because Google will show the relevant ads based on the keywords used on your post use the high CPC keyword will also help to boost your Adsense revenue. At bottom you can use any type of ads but it should be image and text Google ADS

NOTICE: Always add the ads font color similar to your text color. Example - If your text color is red on the post add the red font color on your Google ads. I mean to say that your ads should not look like ads.

Placing Google ADS Between Two Post.


Placing your Adsense ads between two posts will help also help you to increase your Adsense revenue. You can place this ads by going to Blogger Dashboard > Earning > Adsense , there are three option you can chose the beast option for your blog.

# Display ads below my posts and in the side bar
# Display ads below my posts only
#Display ads in the side bar only


Placing Google Custom Search Box.

You can place your Google custom search box on top inside the navigation bar, how to integrate Google search box in one of my blog post I have shared with you all with step-by-step you can see , integrate Google Adsense Custom Search in blogger blog.


Now, if you want to ask me any question on this or having any question about the placement of your ads and always select Text and image ads for your blog. Hope you all have understood how to place your Google ads on your blogger blog for higher revenue.

Don’t forget to share this post with others on Facebook and other social media.